Tenant Data Isolation: Patterns and Anti-Patterns
Explore effective patterns and pitfalls of tenant data isolation in multi-tenant systems to enhance security and compliance.
Jul 30, 2025
Read More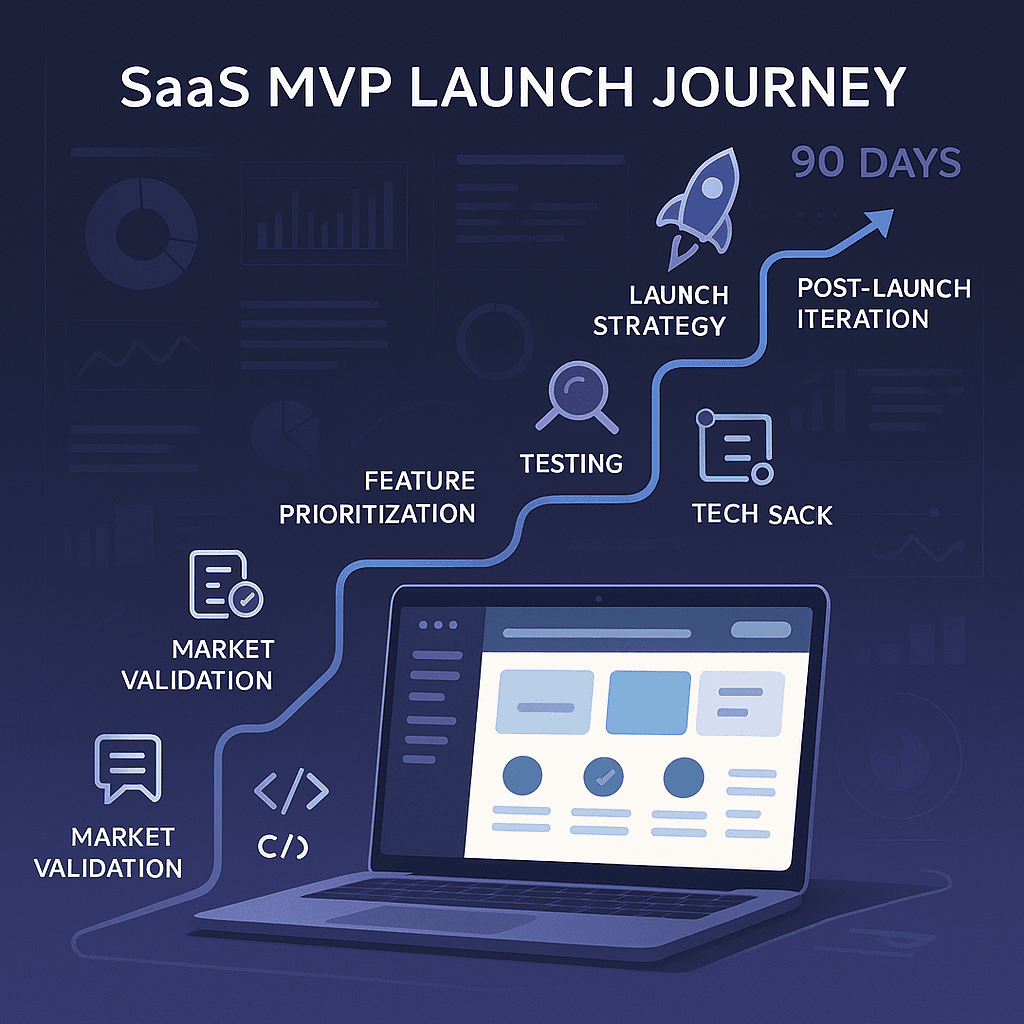
Launching a SaaS MVP in 90 days is achievable if you follow a focused, step-by-step plan. Here's how you can do it:
Key Metrics to Track:
Before diving headfirst into development, make sure your SaaS idea addresses a real need in the market. Taking the time to validate your concept can significantly boost your chances of success.
Start by connecting with potential customers to understand their biggest challenges. According to research, 72% of startups tweak their products based on feedback gathered during early iterations. Use a mix of qualitative and quantitative methods to get a clear picture of their pain points and the effectiveness of existing solutions.
| Research Method | Purpose | Timeline |
|---|---|---|
| Customer Interviews | Identify pain points and workflows | Days 1–5 |
| Online Surveys | Collect measurable insights | Days 6–10 |
| Market Analysis | Study competitors and market size | Days 11–15 |
"Validation is figuring out if there's a real problem that's painful enough that people will pay you to solve it." - Jorge Lewis
Define specific, measurable goals to track your progress during the validation process. Focus on three key areas:
A great example of this approach is Buffer. They validated their social media scheduling tool by creating a simple landing page that described the product. By tracking sign-ups, they confirmed demand before diving into full development.
"Money is the best validation for a SaaS solution. If users are willing to give you money in exchange for the earliest version of your product, that could be the earliest form of validation."
Here are some key ways to validate your idea:
You can also monitor online forums, social media, and tools like Google Trends to see how much buzz your target problem generates.
Once you've validated your idea, you'll be ready to refine your product's core features in the next step. These insights will guide your decisions as you shape your MVP.
Leverage the insights from your market validation to zero in on the features that truly matter. Aim to focus on 3-5 core features - this keeps development efficient and ensures your MVP directly addresses user needs.
The MoSCoW method is a practical way to sort features by their importance to your MVP’s success. It helps ensure your efforts are concentrated on the most essential functionalities.
| Category | Description | Example Features |
|---|---|---|
| Must-have | Essential for the product to function | User authentication, basic data storage |
| Should-have | Adds meaningful value but isn’t critical | Basic reporting, email notifications |
| Could-have | Nice to include but not urgent | Advanced analytics, customization options |
| Won't-have | Out of scope for the MVP | AI-powered predictions, third-party integrations |
For example, a risk management startup applied the MoSCoW method to streamline their MVP. By sticking to just the must-haves, they launched their product in 120 days and secured five paying B2B customers within the first month. Once your core features are prioritized, the next step is to visualize how users will interact with them.
Mapping user journeys helps you pinpoint the key touchpoints where your product needs to shine. This process highlights which features are most critical for user success and which ones can wait for later development.
Here’s how to create effective user journeys:
For instance, a SaaS platform found that users needed immediate access to core functionalities, while more advanced features could be postponed. This focus on essentials streamlined their development process and ensured a smoother launch.
Selecting the right technology stack is crucial for speeding up development and ensuring scalability. According to market analysis, organizations use an average of 177 apps to manage their operations. With so many tools in play, choosing the right technologies can make or break your project.
Backend-as-a-Service (BaaS) platforms are game-changers for backend development. They provide ready-to-use services like authentication, databases, APIs, and storage. This means you can focus your energy on building standout features instead of reinventing the wheel with basic functionalities.
"The technology stack you select dictates the abilities and limitations your SaaS project will have, as well as its versatility and customizability. Some companies and clients like to pick unique stacks for their projects, but this will only make maintenance and product support harder and more expensive down the road." - Oleksii Glib, Founder of Acropolium
After setting up your BaaS, consider adopting serverless architecture to further streamline your infrastructure.
Serverless architecture is all about simplicity and cost efficiency. It eliminates the need for server management, which can significantly cut down on operational expenses. Gartner reports that startups can reduce infrastructure costs by as much as 80% by going serverless. A great example is Heavywater, a startup that slashed its backend maintenance costs from $4,000 to just $30 by switching to a serverless model.
To set up a serverless infrastructure, start by choosing a major cloud provider with robust serverless offerings. Pair this with a scalable database and pre-built authentication to save precious development time while keeping your system flexible and efficient.
Once your technology stack is in place, it’s time to organize your development process. Agile methodologies are a great fit for MVP projects, as they emphasize iterative cycles, regular feedback, and flexibility.
Two-week sprints strike a good balance between steady progress and adaptability. Each sprint should aim to achieve clear, measurable goals that bring you closer to launching your MVP.
"Agile development methodology is a tried and tested approach that emphasizes iterative development, frequent feedback, and adaptability. It aligns perfectly with the goal of speeding up web app development." - Urjashee Shaw, Web app developer at Simpalm
Here’s a simple structure to guide your sprint cycles:
| Sprint Phase | Duration | Key Activities | Deliverables |
|---|---|---|---|
| Planning | Day 1 | Define priorities, break down tasks | Sprint backlog, story points |
| Development | Days 2-8 | Write code, perform unit testing | Working features |
| Testing | Days 9-12 | Conduct QA, fix bugs | Test reports |
| Review | Days 13-14 | Hold demos, gather feedback | Sprint retrospective |
Keep everyone on the same page by documenting progress and fostering open communication. This helps avoid silos and minimizes technical debt.
To sustain momentum during sprints, automation is your best friend.
Using Continuous Integration/Continuous Deployment (CI/CD) pipelines can speed up your development workflow. Automation in testing, integration, and deployment helps catch issues early while maintaining consistent code quality.
Now that automated tests have been deployed in earlier sprints, it’s time to assess your MVP’s performance. During days 75-85, focus on gathering user feedback and analyzing key metrics to confirm your product is ready for launch.
Recruit a group of 20-50 beta users who closely resemble your target audience. Use a combination of feedback methods to gain a well-rounded understanding of their experience. For deeper insights, conduct 15-30 minute interviews with 5-10 of these users.
Here’s a breakdown of feedback methods and their goals:
| Feedback Method | Timeline | Purpose | Key Metrics |
|---|---|---|---|
| User Interviews | Days 75-80 | Gather qualitative insights | Task completion rate |
| In-app Surveys | Days 75-85 | Measure feature satisfaction | User satisfaction score |
| Usage Analytics | Continuous | Track behavior patterns | Session duration |
| Support Tickets | Days 80-85 | Identify pain points | Issue frequency |
When conducting moderated testing sessions, focus on evaluating key user journeys such as:
Combine the feedback you gather with performance metrics to finalize your testing process. This dual approach ensures you address both user experience and technical functionality.
Keep a close eye on technical performance and user engagement to confirm your MVP is ready for prime time. Set up a robust monitoring system during days 80-85 to track critical metrics like:
For load testing, simulate 2-3 times your expected user base. A typical SaaS MVP should handle 200-500 concurrent users without issues. Use cloud-based tools to test performance under different conditions. Here are a few approaches you can use:
Pay attention to both the numbers and how the system behaves under pressure. Implement caching solutions, like Redis or Memcached, and configure auto-scaling to handle traffic surges effectively. This ensures your MVP can perform reliably, even under demanding conditions.
Now that performance testing is done, it's time to turn those insights into a well-defined launch strategy.
Plan a controlled launch during Days 86–90 to gather user feedback while minimizing risks.
Break your launch into three clear phases:
| Phase | Timeline | Target Users | Key Activities |
|---|---|---|---|
| Private Beta | Days 86–87 | 50–100 users | Invite key users with personalized support |
| Public Beta | Days 88–89 | 500–1,000 users | Controlled access through a waitlist |
| Full Launch | Day 90 | Open access | Launch full-scale marketing efforts |
For the private beta, onboard users via short calls and set up a dedicated Slack channel to collect quick feedback. This hands-on approach helped a financial platform land five B2B customers in their first month.
During the public beta, focus on:
Once the staged rollout begins, rely on analytics to validate your strategy and guide adjustments as needed.
Make sure analytics are ready before launch to track key metrics effectively:
Set up your analytics dashboard to highlight critical conversion points like signup completions, feature activations, payment conversions, and support ticket resolution times. Automate daily reports to quickly address issues and steer post-launch decisions in the right direction.
After launching your MVP, it’s crucial to have systems in place to refine and improve the product using real-world data and user feedback.
To improve your product effectively, you need a clear understanding of what users want. Integrated tracking tools can help you gather actionable insights. In fact, 87% of successful SaaS companies use third-party analytics tools during the MVP phase to guide their decisions.
In-App Feedback Collection
Add feedback forms directly within your app to capture user insights about how features are being used, pain points they’re experiencing, and ideas for improvements. Gathering both quantitative data (like feature usage stats) and qualitative feedback (like user suggestions) will help you prioritize updates.
Usage Analytics Dashboard
Track and analyze key metrics to understand how your product is performing. Here are some important areas to monitor:
| Metric Type | Key Indicators |
|---|---|
| Acquisition | Sign-up rates, traffic sources |
| Activation | Feature adoption, first actions |
| Retention | Usage patterns, churn rate |
| Revenue | MRR, ARPU, CLV |
Feature Flag System
Feature flags allow you to roll out updates to specific user groups gradually. This approach not only minimizes risk but also provides valuable feedback from targeted users. For example, Intercom reduced their churn rate by 19% in March 2023 by using feature flags to focus improvements on at-risk customers.
Use this feedback and data as the foundation for regular product reviews to keep your development efforts aligned with user needs.
Schedule bi-weekly product review meetings to dive into metrics and prioritize updates. Research shows that companies leveraging analytics make decisions five times faster than those that don’t.
Key areas to focus on during these reviews include:
Bringing a SaaS MVP to life in just 90 days requires careful planning and execution. With research showing that 42% of startups fail due to a lack of market need, having a well-thought-out strategy is crucial. According to a 2024 report by SaaS Insider, the most effective MVPs concentrate on delivering only the essential features at launch.
Here are some key metrics to guide your efforts:
| Metric | Benchmark |
|---|---|
| 3-Month Retention | 40%+ |
| CLTV/CAC Ratio | 3:1 |
| Core Features | 3–5 |
| Development Time | 90 days |
By keeping these benchmarks in mind, you'll be better positioned to execute a successful MVP launch.
To launch your MVP effectively, begin by validating your idea and setting clear, realistic goals. Take inspiration from Dropbox: they tested their concept with a simple demo video, which generated thousands of sign-ups almost instantly, proving there was demand before they even built the product.
Propelius Technologies offers a streamlined 90-day MVP sprint that incorporates full-stack development, UI/UX design, quality assurance testing, and a post-launch warranty. Their approach also includes a progressive development roadmap and a flexible payment plan (50% upfront and 50% upon delivery), ensuring a smooth process from start to finish.
"62% of SaaS startups underestimated the time and resources required for legal compliance, leading to launch delays and increased costs." - TechCrunch 2025 Survey
To stay on track, follow the example of successful companies like Slack, which focused on delivering core functionality first. By prioritizing what truly matters, you can achieve rapid deployment without compromising on quality - all within your 90-day timeline.
To make sure your SaaS idea tackles a real problem, start with market research and customer interviews. Talk directly to potential users to uncover their challenges and see if your solution aligns with their needs. This kind of direct feedback is invaluable for fine-tuning your idea and ensuring it’s relevant.
After that, develop a Minimum Viable Product (MVP) or even just a simple landing page to test the waters. These tools let you measure interest, gather data, and assess demand. Watch for indicators like sign-ups, pre-orders, or survey results that show people are not only interested but willing to pay for what you’re offering.
Blending thorough research with hands-on testing helps you validate your idea faster and minimizes the risk of creating something that doesn’t solve real problems.
Using Backend-as-a-Service (BaaS) and serverless architecture can be a game-changer when developing a SaaS MVP. Here’s why:
For startups looking to launch quickly while staying flexible for future growth, BaaS and serverless architecture offer a practical and efficient solution.
To use the MoSCoW method for prioritizing features, begin by listing every potential feature you’re considering for your MVP. Next, sort these into four clear categories:
The priority should always be on completing the Must have features first. These ensure your MVP is functional and achieves its main objectives. Features from the Should have and Could have lists can be tackled in future updates. This structured approach keeps the process focused, reduces unnecessary complications, and helps you launch faster.
Need an expert team to provide digital solutions for your business?
Book A Free CallDive into a wealth of knowledge with our unique articles and resources. Stay informed about the latest trends and best practices in the tech industry.
View All articlesExplore effective patterns and pitfalls of tenant data isolation in multi-tenant systems to enhance security and compliance.
Jul 30, 2025
Read More
Implement these 10 Quality Assurance steps to enhance the reliability and performance of your SaaS application while minimizing bugs and user abandonment.
May 21, 2025
Read More
AI automation is revolutionizing SaaS performance by optimizing costs, enhancing user experiences, and streamlining operations.
May 15, 2025
Read More
Learn effective strategies to debug third-party API errors and maintain application stability while enhancing user experience.
Jul 30, 2025
Read More
Learn how to safeguard your API backends against rising Man-in-the-Middle attacks through encryption, authentication, and secure network practices.
Jul 30, 2025
Read More
Choosing between a mobile app and a web app for your SaaS product? Explore key factors like cost, user engagement, and development speed.
May 21, 2025
Read More
Learn best practices for linting React code to improve quality, consistency, and collaboration in your development projects.
Jul 30, 2025
Read More
The IT industry continues to drive innovation and redefine the way businesses operate. In this blog, we explore how IT solutions are transforming industries, enhancing...
May 8, 2025
Read More
When it comes to SaaS (Software as a Service) platforms, one thing is clear: user experience (UX) is everything. At Propellius Technologies, we know that...
May 8, 2025
Read More
Apple faces unprecedented challenges in AI as OpenAI acquires Jony Ive's design team for $6.5B and Google partners with Samsung on Android XR. Can Apple's...
May 22, 2025
Read More
Explore common challenges in SaaS development, including scalability, security, and API integration, along with effective solutions for each.
May 23, 2025
Read More
Learn how to manage concurrency in serverless architectures effectively to enhance performance, reduce costs, and prevent throttling.
Jul 30, 2025
Read More
Trump administration revokes Harvard's ability to enroll international students, impacting 6,800 students and threatening Silicon Valley's talent pipeline. Analysis of implications for US tech leadership.
May 23, 2025
Read More
Explore the top cloud solutions that optimize scalability, security, and cost for modern SaaS architecture, helping businesses thrive in the cloud.
May 23, 2025
Read More
You know how the internet has become such a big part of our lives? Well, the way we use it has changed a lot over...
May 8, 2025
Read More
Learn how staff augmentation can help tech startups save costs, access global talent, and scale teams quickly for efficient growth.
May 26, 2025
Read More
In the digital age, eCommerce has become a cornerstone of the global retail landscape. The low barriers to entry and the promise of reaching a...
May 8, 2025
Read More
Learn how Atomic Design enhances React component organization by breaking down UIs into reusable, scalable pieces while navigating common challenges.
Jun 6, 2025
Read More
AI is revolutionizing how brands communicate. In this article, we dive into how Phrasee, a leader in AI-powered brand language generation, is enabling marketing teams...
Jun 6, 2025
Read More
Effective onboarding of augmented developers in Agile teams boosts productivity and retention through preparation, structured processes, and continuous feedback.
Jun 5, 2025
Read More
Selecting the right tech stack for your MVP is crucial for startup success, impacting costs, scalability, and development speed.
Jun 5, 2025
Read More
Learn key strategies for scaling your SaaS product from MVP to enterprise level, focusing on architecture, performance, security, and cloud optimization.
May 26, 2025
Read More
Explore seven human-centered design principles that can transform your MVP into a user-centric product that resonates and drives success.
Jun 9, 2025
Read More
Optimize memory usage in AI workflows to cut costs and enhance performance with effective strategies and tools for better resource management.
May 29, 2025
Read More
Explore the essential UI/UX best practices for SaaS applications in 2025, focusing on personalization, accessibility, and innovative input methods.
May 26, 2025
Read More
Learn how a 90-day MVP sprint can minimize risk, cut costs, and ensure a successful product launch through rapid validation and user feedback.
May 30, 2025
Read MoreOptimize real-time streaming with effective data compression techniques that reduce latency and enhance performance across various industries.
Jun 17, 2025
Read More
Explore the strengths and weaknesses of Supabase and Firebase for real-time collaboration tools, focusing on scalability, performance, and developer experience.
Jun 6, 2025
Read More
Explore the differences between two leading platforms for MVP scaling, focusing on their database structures, pricing, security, and performance.
Jun 5, 2025
Read More
Learn how Test-Driven Development (TDD) can enhance the reliability and maintainability of React applications through structured testing.
Jun 6, 2025
Read More
Learn how to effectively balance technical debt with innovation to ensure sustainable growth and maintain a competitive edge in your startup.
May 29, 2025
Read More
Learn how to foster a thriving knowledge-sharing culture in remote teams through psychological safety, technology, and effective communication.
Jun 6, 2025
Read More
A complete guide to choosing the right mobile app development company—covering expertise, transparency, UX focus, agile methods, and long-term partnerships to ensure your app succeeds...
Jun 12, 2025
Read More
Explore effective caching strategies for dependency management that enhance build performance and reduce costs in software development.
Jul 29, 2025
Read More
Unlock your system's performance potential by effectively analyzing logs to identify bottlenecks and optimize operations.
Jun 17, 2025
Read More
Explore essential practices for checkpointing in stream processing to ensure data integrity, fault tolerance, and efficient recovery from failures.
Jun 9, 2025
Read More
Learn how to effectively use a popular JavaScript library for mocking and stubbing in tests, enhancing reliability and speed in your development process.
Jun 9, 2025
Read More
Learn how to effectively automate regression testing in CI/CD pipelines to enhance software reliability and speed up development.
Jun 17, 2025
Read More
Learn essential best practices for managing secrets in CI/CD pipelines to protect sensitive data and enhance security against breaches.
Jun 6, 2025
Read More
Explore how Agile roles enhance MVP development by fostering collaboration, speeding up delivery, and ensuring products meet user needs.
Jun 11, 2025
Read More
Explore how manual testing enabled startups to launch high-quality MVPs in just 90 days, ensuring speed without sacrificing user experience.
Jun 6, 2025
Read More
AI-driven predictive scaling enhances resource management in DevOps by forecasting demand, reducing costs, and ensuring system reliability.
Jul 29, 2025
Read More
Learn how to effectively scan and fix vulnerabilities in React and Node.js projects to ensure secure applications and safeguard against risks.
Jun 17, 2025
Read More
Agile sprints streamline MVP development, enabling rapid iterations, user feedback integration, and efficient project management for startups.
Jun 17, 2025
Read More
Aligning designers and developers through shared standards and effective collaboration can drastically improve efficiency and product quality.
Jun 11, 2025
Read More
Align your teams for faster MVP sprints by creating a shared vision, setting collaborative KPIs, and leveraging effective workflows.
Jul 29, 2025
Read More
Explore essential best practices for regression testing in DevOps, ensuring software stability and quality amid rapid development cycles.
Jul 29, 2025
Read More
Learn how to create an effective shared knowledge base that enhances team collaboration, boosts productivity, and maintains security.
Jul 30, 2025
Read MoreLearn how to leverage Figma for effective design system collaboration, enhancing team workflows and ensuring consistent design practices.
Jul 30, 2025
Read More
Explore how a financial startup launched a minimum viable product in just 90 days through collaborative prototyping and user feedback.
Jul 29, 2025
Read More
Explore how automated load balancing enhances cloud app performance, reduces costs, and ensures reliability during traffic spikes.
Jul 30, 2025
Read MoreGet in Touch
Let's Make It Happen
Get Your Free Quote Today!

Get in Touch
Let's Make It Happen
Get Your Free Quote Today!

You bring the vision. We handle the build.